Tips and tricks for digital photography.
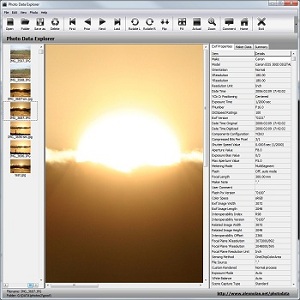
See also: Photo Data Explorer


Follow on Twitter
Follow on Twitter for all the latest updates and new utility announcements. I also tweet useful IT information and any interesting science and technology current affairs and news.

So you have just bought yourself a digital camera and you think that’s all you need to professional photographs. Wrong!
You've taken photos of a spectacular sunset or portrait, but the pictures are rubbish. They are not in focus or perhaps the images are too dark and camera shake has made the shots too blurred. Digital photography seems easy to the amateur compared to analogue film cameras but taking really good photos requires knowledge and understanding of photography.
Here are the basics along with some tips and tricks to produce better digital photos. Here I will go through the following aspects:-
- Storage and Image Quality
- Memory
- Battery Power
- Exposure
- Focus
- Depth of field
- Zooming
- Flash
- LCD View finder
- Printing
Storage and Image Quality
The first thing you need to do before taking any professional photos is to go through the cameras settings which is most case default to the second best compression and resolution settings for quality.
Most digital camera allow you to reduce their resolution or increase the compression to get more images on to the memory card. However, both these will reduce quality. Unless you have a very small memory card, select the highest resolution pictures and lowest Jpeg compression settings. You can always shrink copies of the pictures using software later for use on websites or to email. There are Tiff and RAW options on sophisticated cameras are for expert users – most of the time you will be fine with the best quality Jpeg setting.
When it comes to how much resolution you need, it depends on how much detail you want to capture. More mega pixels means higher detail and bigger enlargements or crops before you the image starts to become pixelated.
You can print your photos as large as you like but for photographic quality most inkjets printers like to be fed 200ppi (pixels per inch). Consequently, 2, 3, 4 and 5 mega pixel cameras are capable of producing good-looking inkjet prints measuring 8x6in, 10x8in, 11x9in and 13x10in respectively. Commercial developers prefer 300ppi, resulting in maximum print sizes one third smaller than those of inkjet printers.
If you crop an image you’ll also have fewer pixels to work with which will mean printouts are smaller too unless you stretch them which will reduce quality. I recommend you buy a camera that can capture at least 3 mega pixels ideally 5 mega pixels.
Memory
Memory is an important part of digital photography but will become less of an issue in the future as storage capacities become larger and larger. Storage capacity dictates how many pictures you can take and how high a resolution they can be.
File sizes for pictures vary but as a rule of thumb you’re looking at between 1MB and 2MB for each digital photo recorded at its highest resolution and best quality Jpeg settings. It’s easy to calculate how much memory you’ll need to store a certain number of photos. The 16MB cards supplied with some cameras are inadequate for anything more than a handful of snaps, which is why I’d recommend buying a 256MB memory card.
There are several memory card formats available for different cameras.
- Smart Media
- Compact Flash
- xD
- MS
- SD
- MMC
Memory cards can be erased and reused but you’ll want to back up your images first. Most people copy their snaps on to a PC or laptop. Many professionals carry notebooks or portable disks for this very purpose. Some high street developers can copy your photos on to blank CDs, allowing you to free up precious memory while travelling.
Battery power
The lifespan of digital camera batteries depending on the model and usage, but one to four hours of solid use is about standard. In practice you’ll power down the camera between pictures, allowing you to take around 50 photos over a period of several days.
Tips to save your battery:-
- Switch off the flash
- Do not use the LCD view finder.
- Switch off button beeps and other sound effects.
- Use high drain rechargeable batteries such as Ni-MH 2300mAh because disposable alkaline AA cells won’t last long in a digital camera
- Use a card reader to move pictures onto your PC instead of connecting the camera and using its batteries.
- If you own a SLR digital camera, purchase a spare battery and the battery grip attachment.
When travelling with your camera you need to take a spare set of rechargeable batteries with you or a replacement battery pack depending on what your camera takes and of course your recharger and a travel adapter for foreign mains sockets.
Exposure
All digital cameras have an auto setting which calculates what it anticipates will be the most suitable exposure. Most devices get it about right, but mistakes happen. There will also be times when you want a darker or brighter result.
In these situations use the exposure compensation settings available on all but the most basic cameras. These allow you to deliberately over- or underexpose the image and are normally offered in a range described as -2EV to +2EV, in EV increments of a third. A setting of -1EV doubles the exposure making it brighter.
Deliberately underexposing an image can be an affective way of cutting through haze or bringing out a colourful sunset. Overexposing is also handy if your subject is dark and you can’t or don’t want to use a fill-in flash. Remember to set the exposure compensation back to zero afterwards though.
Focus
Digital cameras have an auto focus mode but, as with auto exposure, this can go wrong. A common problem is where the subject in the foreground is out of focus, but the background is in sharp focus. It’s clear that the camera has focused on the background by mistake.
You need to understand that most cameras will only focus on the spot in I the middle of the frame. So if your subject is not bang in the middle you should first point your camera at it, and then lock the focus by pressing the shutter button halfway.
Next recompose the shot while keeping the button half-held and, finally, press it all the way to take the photo.
The first time you try this it’s easy to press the button all the way and accidentally take the photo early. It takes practice to learn the right pressure, but at least a digital camera lets you delete the pictures that went wrong.
Focus-Locking is an invaluable technique, but it relies on the camera’s auto focus system to be working in the first place. Under some conditions the auto focus won’t work properly – for example, at dark parties or through windows. In such cases you’ll need to use manual focus, with a setting of 1-2m for people at parties and infinity when shooting through a window. If you’re taking extreme close-ups activate your camera’s macro mode, indicated by a small flower icon. Like exposure compensation, though, ensure you set your camera’s auto focus mode afterwards.
Depth of field
| Shallow depth of field | Longer depth of field |
 |
 |
Depth of field is a technical term referring to how much of the picture is in focus. A large depth of field has lots in focus, while a shallow depth of field only has the main subject in focus.
The former is perfect for compositions where you want close and far away items to be sharp, while the latter is great for portraits with blurred backgrounds.
The depth of field is controlled by the lens aperture, described by its f-number. Smaller f-numbers mean shallower depths of field; larger f.numbers mean larger depths of field. Digital cameras generally have a range of f-numbers between f2.8 and fl1.
These numbers are traditionally selected using aperture priority mode, but this function is restricted to more sophisticated models. Many digital cameras can automatically set small or large depths of fields by selecting portrait or landscape scene preset modes. Note that larger depths of field require longer exposures to compensate, so hold the camera steady. Depth of field can also be accentuated by the lens. Focal length.
Zooming
Most digital cameras are fitted with optical and digital zoom facilities. It’s best to disable the digital zoom as it just crops the centre of the picture and enlarges it, thereby losing quality, The optical zoom uses lenses to get closer to a subject with no loss in quality, but zooming in and out also has other effects.
Shorter focal lengths have larger depths of field, so if you want the maximum in focus zoom out to the widest setting. Conversely longer focal lengths have smaller depths of field, so if you want a portrait with a blurry background stand back and zoom in to the closest setting. Adjusting the lens in this way in combination with specific aperture settings will best control the depth of field.
Instead of just standing still and zooming in and out, try moving closer or further away from your subject to see how this changes and often improves.
Camera Flash
The key to using the flash is to understand its limitations. Built-in flashes are only effective over a distance of a few short metres and, beyond this, have no effect at all. Unless your subject is within a few metres, you might as well switch off the flash.
It’s also a good idea to switch off the flash when shooting through windows to avoid reflection
Flashes are useful in more than just darkened rooms, though. If you’re taking a portrait outdoors during dusk, at dawn, in dim conditions or even on very bright days, forcing the flash to fire can really help illuminate the foreground subject. This is known as a fill-in flash and Is essential when taking a picture of someone in a long exposure night scene.
LCD View finder
A big advantage of digital cameras is being able to use the LCD screens to check a photo immediately after taking it.
This is invaluable for checking exposure . and composition, not to mention potentially blinked eyelids. Beware, though, as the screen
resolution is too low to confirm whether a picture is definitely in focus. So if you’ve got a particularly important shot, play it back
afterwards and zoom in closely to ensure everything’s fine.
Camera screens are also handy for tricky angles. While those that flip out and twist round offer the most flexibility, you can still pretty much see what’s going on if you hold your camera above the heads of crowds – great for snapping celebrities or concerts.
Printing
Even the very best digital camera images can benefit from . a certain amount of retouching or manipulation using your
PC. We’ll go into detail in future issues, but for now here’s a few tricks to get started.
Prints can really benefit from having dark blacks and pure whites. Try slightly bringing in the extreme left and right
sides of the levels or histograms in programs like Photoshop and Paint
Shop Pro. Digital images can also look a little fuzzy, so consider
electronically sharpening the image with the "Unsharp Mask" tool.
Many photos can also be Improved by creative cropping – and not necessarily just to enlarge the central subject. Try cropping landscapes into wider shapes, or tall buildings into narrower ones to accentuate the effect. Just remember the two key rules: always work on copies so your original image is safe and, secondly, there is no right or wrong. Experiment to your heart’s content.
Printing on Inkjet printers.
You may have found that when you print you photos on you inkjet printer that the image is darker and not as good colour as it is when you get printed by professional developers. To correct this convert your picture from RGB (Red Green Blue) to CMYB (Cyan, Magenta, Yellow, Black) before printing. This will improve the colour reproduction. You can do this with programs such as Photoshop and Paint Shop Pro. If anyone knows of a free utility available to do this let me know.